On a long drive back from the SouthWest Show, where RISCOSopen and Chris Hall had been demonstrating a Raspberry Pi 4 running RISC OS, I had been thinking about how I could convert my current Pi 4 networked system into something a bit tidier.
I’d already experimented with the Pi 4 and RISC OS in two ways: RISC OS on Linux; and RISC OS over VNC. The current ROM I had been sent was equipped with video, but Ethernet and USB weren’t available. The workaround for this was to use Elesar’s WIFI HAT to provide networking and then VNC into the Pi4 to control the Pi with a keyboard and mouse.
The trick to setting all this up was to build a card with the Pi4 ROM on it, alongside Pi 3 AND Pi 4 firmware. This could then be run as normal on a Pi 3 to set up the networking, connect to the WIFI and get everything ready, including running the VNC Server and Igor Telnet Server in !Boot. It was then simply a case of moving the card and the HAT to a Pi4 and it magically worked!
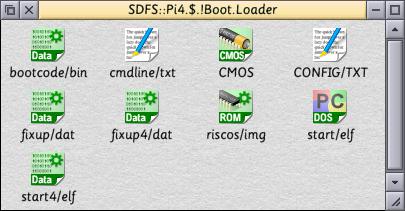
The firmware files required to use the same card on both the Pi 3 and Pi 4 for setup purposes
You’ll note that there is a cmdline/txt file that may not usually be present. The gamma on the Pi4 is excessively bright, so this contains a single line to overcome this.
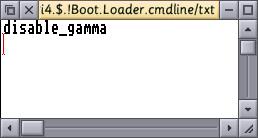
A single command in the cmdline/txt file
This all worked reasonably well, but resulted in a very flickery software mouse pointer and the networked video overheads were unnecessary, as HDMI output worked anyway. A later ROM added a hardware mouse pointer and sound, which meant I could use NetRadio too.
I remembered that I had previously used KMSwitch, part of Thomas Milius’s Remote Tools suite that allowed a keyboard and mouse to be shared between several machines. So I dug it out and set it up, and lo and behold it worked! No need to watch the Pi 4’s screen in a window on the TItanium to navigate.
For a few days I was happy with this system but remembered I’d read that the USB-C port on the Pi 4 was actually connected to a USB 2.0 hub. So I tried several hubs and direct connection of keyboards to the USB-C port but to no avail, whilst powering the device through the GPIO pins with a loosely-fitting On-Off Shim from Pimoroni. Using !USBInfo, the hub was seen but not really recognised. I didn’t know I’d jumped the gun a bit and that the driver hadn’t been fully developed yet!
In the days prior to the SouthWest Show, ROOL revealed that they had completed the work on the hub chip and it was now possible to use. Reports began appearing on their Forum about different hubs being used successfuly, often prompting the yellow ‘underpower’ flash on screen, especially when using a USB Ethernet adaptor
Indeed on the day of the show, ROOL were demonstrating it working with a hub hanging off the USB-C port connected to a keyboard and mouse. The WIFI HAT was in evidence to provide a network connection. Similarly, Chris Hall had one set up in the same way.
On the journey home, I began to ponder how to tidy it up and encase it in some way. But first I needed a ROM with USB enabled. Rob, my collaborator on !ZillaRAM mentioned he had a Pi 4 and suggested he had the wherewithal to build the ROM. By the time I got home, a USB-enabled Pi 4 ROM was waiting in my inbox!
With the ROM still being built at this time, I turned my thoughts to the hardware side. I’m not a fan of things hanging about all over the place (most of my case designs are predicated by a need to hide cables!), and I like things tidy, so just having a hub hanging from the USB-C port was never going to satisfy me.
I am a big fan of ‘form-factor hubs’ especially the UUGear ones, and I had a few spare ones lying around. Most of them utilise Pogo Pins for connecting to the Pi board, but often offer micro USB inputs too.
Having originally considered a Zero4U, I thought the ACE4U, as designed for the Pi Model A, might be a better fit as it is the same footprint as the WIFI HAT. There is a USB hub that is exactly the same size as the standard Pi models, but seven USB ports felt a bit like overkill.
But I needed to see if the ROM worked first. So, on arriving back at home, I went back to setting up my Pi4 with a WIFI HAT, the On-Off Shim and plugging a USB mouse into the USB-C port, via USB-C to micro USB adaptor connected to a micro USB to USB type A adaptor! And it worked! But the On-Off shim was too loose to be useful, and as I don’t like soldering onto the GPIO ports, I needed an alternative method. The thing also ran very hot, so, unlike previous Pi models, I felt it needed active cooling. I had a Fan Shim, also from Pimoroni, and this seemed ideal, but was physically impossible to fit alongside the On-Off shim and the WIFI HAT.
I had a UGreen USB 2.0 hub with Ethernet built in, so removed the HAT, and plugged in the hub, connected up the keyboard and mouse, plugged an ethernet cable into the end and turned on. A very long pause on the DHCP stage of the boot sequence resulted. Did it not work?
Upon checking, I realised I hadn’t set it to use the USB Ethernet connection, turned it on and rebooted. Success! A Pi 4 running RISC OS, with USB and ethernet!
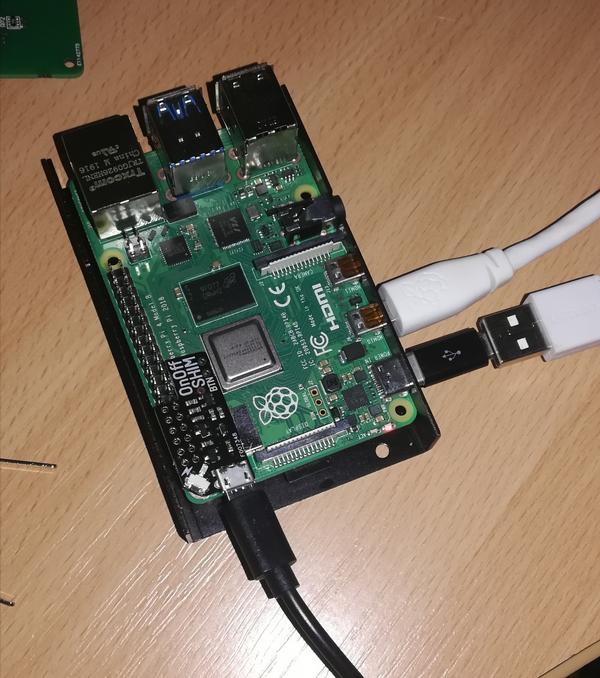
Pi 4 running RISC OS with USB – note the On-Off Shim, and the adaptors to make the USB type A plug connect to the USB-C port.
Now to try the ACE4U hub. I had a quick look at the manual and realised it could backpower a Pi using the micro USB connector. Normally, backpowering is carried out by connecting the micro USB on the hub to the USB A port on the Pi Model A, sending power through the Pi from the USB port. I wondered if it would work the same way with the USB-C, so using the same series of adaptors and a noodle micro USB cable, I connected it all up. I decided to revert back to the WIFI HAT too, changed the necessary network settings via the Pi3, put it all back together and bingo! It worked!
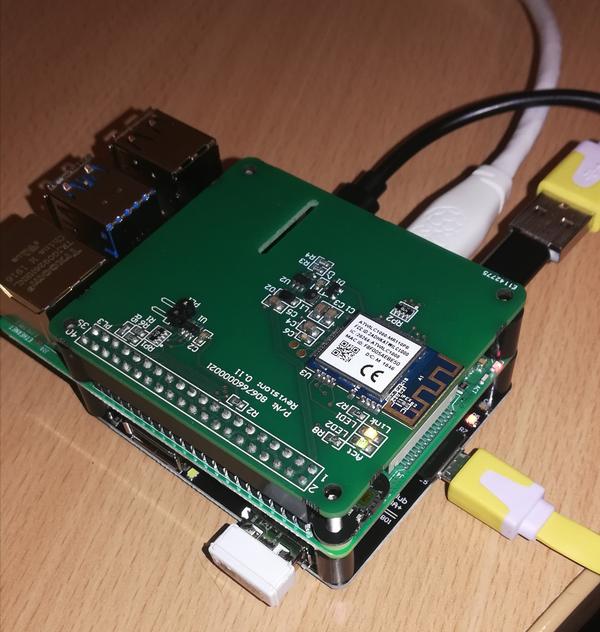
The compact edition, with the adaptors still in place.
Given that I’d used an ACE4U, the holes in the hub, Pi4 and WIFI HAT all aligned. I could physically connect them all together in some sort of triple stack without too much bother – just long enough screws and appropriate spacers required. The result was a compact looking Pi 4 system.
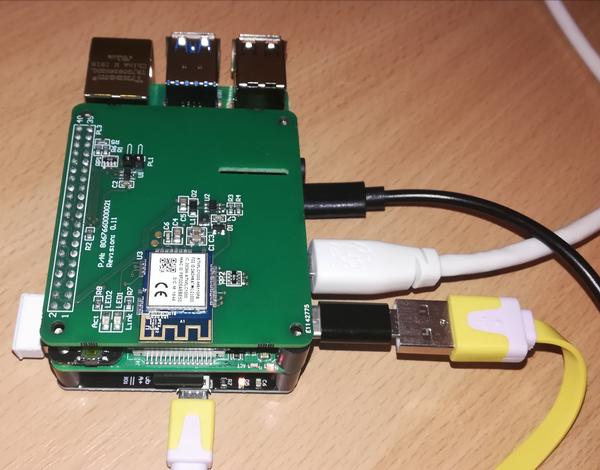
See how the yellow cable connects the powered ACE4U to the Pi’s USB-C Port for both power and data.
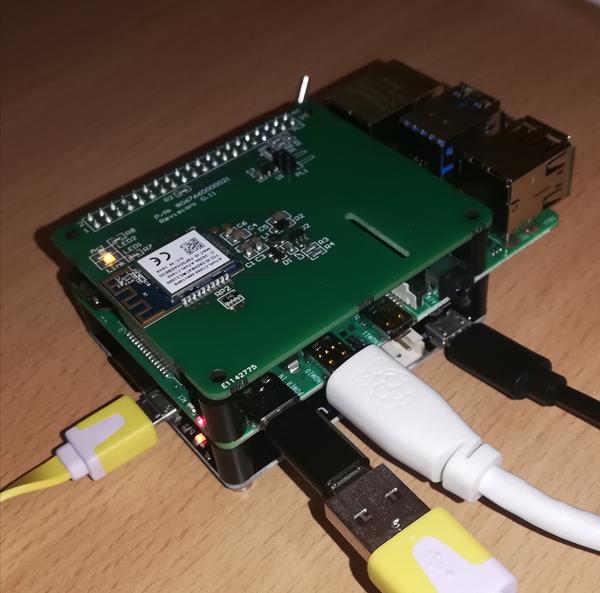
A slightly crazy adaptor set! This was replaced later by a right angled micro USB to USB-C cable.
So, once you’ve got hold of your Pi 4 ROM and set up your RISC OS micro SD card, all you need to build your own Pi 4 RISC OS machine is listed below:
- Raspberry Pi 4
- ACE4U USB hub
- Short USB-C to micro USB cable
- Elesar WIFI HAT
- Pimoroni Fan Shim
- 4x 35mm m2.5 machine screws and nuts
- 8x 11mm spacers
- 5v 3a microUSB power supply
And there you go. A working, net-connected Pi 4 RISC OS system. Before the port is ready!
In the next blog, I’ll explain how I modified a Deuce case for my new Pi 4 Desktop system.
